

Do you want to learn how to paint a portrait from a photograph? If so, then you’re in luck! Painting a portrait from a photograph can be an incredibly rewarding experience. It’s something that anyone can do with the right guidance. Here, we’ll walk you through the steps to create your own beautiful masterpiece.
From choosing the right photo to deciding on a color palette, painting a portrait requires patience and dedication. But don’t worry, you don’t need to be an experienced artist or have expensive supplies. With just some basic materials and our helpful advice, you can create your own stunning piece of art that will last for years.
So don’t wait any longer! Whether you’re looking for an interesting hobby or just want to give your home décor a unique touch, painting a portrait from a photograph is sure to bring out your inner artist.
Overview of the Process
Creating a custom artwork of a hand-painted portrait from a photograph is like baking a cake. It requires careful preparation, quality ingredients, and the right proportions to produce something that looks great and tastes delicious. To paint a portrait from a photo, you will need to select the right image, choose the right paint and canvas, adjust the colors and values, and finally add your own creative touches. In short, it’s an art form that requires attention to detail and skillful execution. With these steps in mind, let’s move on to choosing the perfect image for your painting.
Choosing the Right Image
Now that you have a general overview of the painting process, it is time to start thinking about which photograph you will use. Whether you are a professional artist or just getting started, choosing the right photo is essential. It should be one that speaks to you and portrays the subject matter you wish to paint.
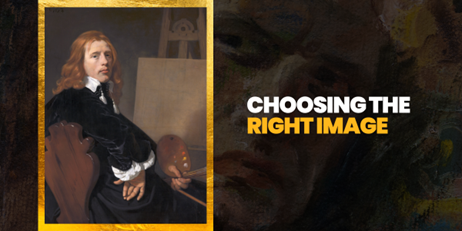
When selecting your image, choose one that has good contrast and clarity. Professional photographers often take pictures with the idea of painting them, making those the perfect photos to use for your painting. If you don't have access to such photos, look for ones taken by family or friends, or take some of your own. You can always edit them with computer software to make them more suitable for painting.
Choose one of your favorite photos This will give your portrait an emotional connection and make it more meaningful. After all, it is not just a photo but rather a reflection of the subject captured within it. Once you have selected your image, it's time to start gathering inspiration from the photograph and applying it to your canvas.
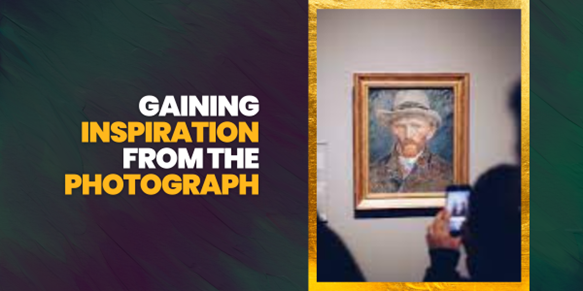
Gaining Inspiration from the Photograph
Painting a portrait from a photograph requires more than just effort and skill; it requires inspiration. study the photo carefully before beginning the painting. Pay close attention to details such as the subject's expression, clothing, hairstyle, etc. Think about what inspires you about the person in the photograph and what kind of message their portrait will convey.
The best way to gain this kind of inspiration is to take your time when looking at the photograph. Don't rush yourself into starting the painting until you feel comfortable with it. Consider studying each part of the portrait separately until you have gained enough insight. Don't be hard on yourself if it takes time to understand what makes this photo unique and inspiring.
A hand-painted portrait can be a unique gift or a regular service that many people offer these days. Whatever your reason for wanting to paint a portrait from a photograph, make sure that you take the time to really connect with it before beginning your work. This ensures that your portrait painting captures its beauty and emotion accurately. With careful observation and thoughtful consideration, you can accurately translate your vision onto canvas and create something truly special!
Next up: Preparing canvas and palette.
Preparing the Canvas and Palette
Now that you have gained inspiration from your photograph, it's time to prepare the canvas and palette. This is a crucial step in creating a beautiful portrait, as it sets the groundwork for the painting.
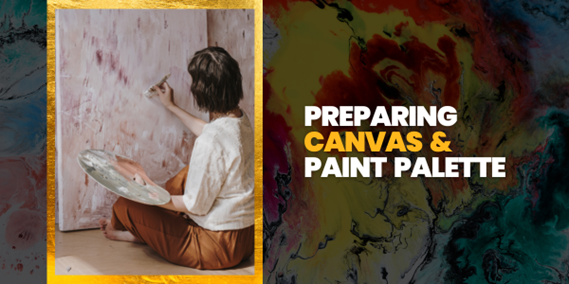
To begin, select a canvas size that suits your needs. If you want your painting to be large, consider investing in an express service to ensure a quick delivery. Be sure to check what kind of service costs are associated with the size of canvas you order, as well as any money-back guarantee offered by the company. You can also purchase a canvas from a nearby art supplies store if there is one in your area.
Next, gather pencils, brushes, and paints for your portrait. Consider purchasing a pre-made palette if you're just starting out with painting. This eliminates any guesswork on what colors and hues to use for your piece. Once you have your supplies ready, it's time to move on to sketching outlines and shading!
Sketching Outlines and Shading

Once you've got your photograph ready, it's time to begin sketching the portrait. It's important to take your time to capture the details of the person and objects in your portrait. Use an HB pencil to lightly draw a basic outline of the subject's face and features. This step will give you an idea of how large or small you want the portrait to be.
As you continue sketching, add more detail by emphasizing certain areas with dark shading and highlights with lighter shading. Pay close attention to any distinct features that make the subject stand out. This will make your final portrait something you can treasure forever!
Taking these steps will ensure that you'll have a beautiful final product If you need professional help, don't hesitate to reach out via email for advice on how best to proceed with your portrait.
Adding Color to the Portrait
The next step in creating a highly professional portrait painting is adding color. For this, a few supplies are needed, including paint and brushes.
Blocking in the colors
Start by blocking in large areas with solid blocks of color, rather than starting right away on the detail.
Blending colors
Use varying shades of each color and blend them in order to create a more lifelike effect.
Finishing touches
Once all of the main colors have been laid down, add any details like highlights or shadows for extra dimension.

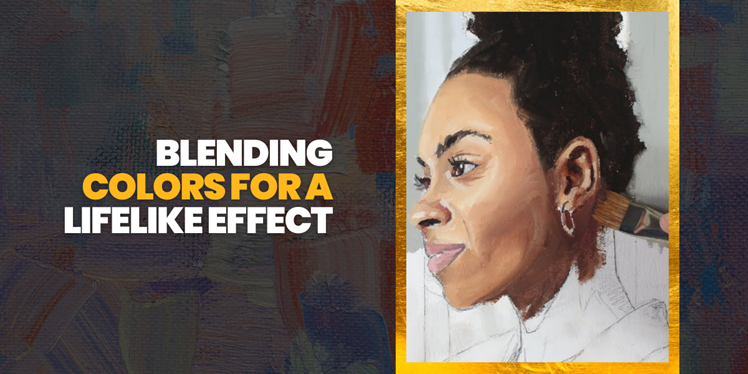
Blending Colors for a Lifelike Effect
Once you have sketched out the portrait, it's time to start adding color. To paint a lifelike portrait from a photograph, it's important to blend colors together in subtle gradations. Start with a layer of flat paint, and build up from there. Add darker and lighter shades around specific areas to simulate shading. This will bring your portrait to life and create a three-dimensional effect.
Pay attention to the details and don’t be afraid to mix colors until you get the desired result. Complementary hues give your portrait more depth and dimension. Start by picking two or three primary colors that are present in your photograph, then use combinations of these as you blend them together on the canvas. Use black and white paints to play with shade and tone, which will add depth and texture.
When working with oil paints, less is more. Flat layers of color can look dull if overworked, so take your time with each brush stroke and make sure each transition is seamless before moving on to the next area of the painting. With practice, you'll soon find yourself able to achieve stunning results with a few simple strokes of the brush!
With an eye for detail and careful blending techniques, you'll be able to complete your portrait painting with realistic shading and tones that capture its subject perfectly. Now all that’s left is to put on those finishing touches!
Finishing Touches and Finalizing the Painting
Once the painting is almost finished, it's important to add a few finishing touches. This can be done by adding texture and depth to create a more realistic portrait. An artist can achieve this effect by adding layers of highlights and shadows. The highlights should be placed in areas that catch the light, such as around the eyes and nose, while shadows give the painting an extra dimension.
The next step is to finalize the painting by making any necessary adjustments to ensure that it looks its best. This could include blending colors together, softening edges, or making small changes to highlight certain features. It's also important to consider how light affects your artwork and make sure that it looks as realistic as possible when viewed under different lighting conditions.
With these final touches complete, it's time for you to step back and appreciate your work! With a few tips and tricks, anyone can master the art of painting portraits from photographs and create beautiful works of art that will stand the test of time.
Tips for Beginners
With the initial sketch and underlying layers complete, focus on the details that will make the portrait stand out. Firstly, it is important to accurately identify the hues of your subject’s skin tones. Mix small amounts of paint on your palette before applying it to the canvas. This will ensure you have control over how much of each color is used. Secondly, when constructing facial features, try using thinned-down paint for small brush strokes or thicker paint for larger areas like cheeks or forehead. Finally, to capture light and shadow patterns, use medium-value colors like lavender or gray to create depth and contrast. With these simple tips in mind, you can begin to master the art of painting a portrait from a photograph.
Advanced Techniques for Experienced Painters
For experienced painters, there are some advanced techniques that can be used to paint a portrait from a photograph. The most important is the use of color, which has the power to make the subject stand out and create a sense of realism. It's important to choose colors that will bring out the subject's features and create contrast between light and dark areas. It's also helpful to use different brushstrokes to add texture and depth to the painting.
Pay close attention to details such as facial expressions, clothing textures, hair styles, and other elements that could make the portrait more lifelike. Finally, experienced painters should consider using multiple layers in their paintings in order to achieve more realistic results. By layering different colors and textures on top of each other, they can create a greater level of detail in the final painting. With these advanced techniques, experienced painters can create beautiful portraits that capture the subject’s personality. Though these techniques are for experienced painters looking to bring more lifelike qualities to their artwork, painters of any skill level would benefit from exploring these methods.
Pros and Cons of Painting Portraits from Photos
Now that experienced painters are familiar with the advanced techniques for painting portraits, it’s time to discuss the benefits of painting portraits from photographs. For starters, it's a great way to learn how to accurately render light and shadow without having to worry about your model moving or changing their expression. Additionally, you don't have to worry about a limited amount of time, since you can take as much time as you need when working from a photograph. And finally, painting from photos allows artists to capture moments in time that they may not be able to easily recreate otherwise.
Painting portraits from photographs offers many advantages, but there are also some drawbacks that should be considered. One disadvantage is that it can be difficult for an artist to capture the personality and uniqueness of their subject when working from an image. Additionally, it can be tempting for an artist to rely too much on the photograph instead of using their own creativity and interpretation. That said, with practice and patience, these issues can be overcome, and a beautiful portrait can be created from a photograph.
Let’s now consider the necessary art supplies for this project.
Art Supplies Needed
Believe it or not, painting a portrait from a photograph doesn’t require you to spend a fortune on art supplies. In fact, armed with just a few basic tools, you can create beautiful artwork that will be treasured for years to come. Here’s what you’ll need:
- Paint Brushes
- Acrylic Paint
- Canvas
First and foremost, you’ll want paint brushes of different sizes and shapes in order to create the various details of your portrait. Make sure you choose high-quality brushes, so they won’t shed hair into your artwork! Next, select some acrylic paints that match the colors of your photograph as closely as possible this will ensure your portrait looks realistic when finished. Finally, choose a canvas that’s large enough for your desired painting size; if you’re unsure what size to get, err on the side of caution and pick one slightly larger than needed.
When it comes to capturing those special moments in time forever, choosing high-quality photography prints is paramount after all, these are the images that will serve as the foundation for your masterpiece!
Choosing High-Quality Photography Prints
When it comes to choosing the right photograph prints for painting a portrait, quality is key. Poor-quality photographs will result in bad paintings, so it's important to choose high-resolution images that can capture the details of the subject. To ensure you get the best prints possible, look for digital photos taken with professional-grade cameras or scans of film negatives. If you're using snapshots, try to find those taken on 35mm film or higher and avoid any low-resolution mobile phone pictures.
When selecting your photo prints, pay attention to size as well. You'll need enough detail for a convincing portrait; 8x10-inch prints should be more than enough for most purposes. Professional printing services are also available online and in retail stores that provide additional options like canvas wraps and archival paper.
With good-quality photographs in hand, you're ready to start painting your portrait masterpiece!
Finding Professional Services to Create Unique Gifts
Now that you have chosen high quality photography prints for your portrait, it's time to begin the painting process. There are a number of ways to go about this, from doing it yourself to finding professional services. Here are some tips for finding professional services to create unique gifts:
- Ask family and friends – Finding a good painter can be daunting at times, but don't forget to ask around! Friends and family may know of someone who offers painting services or can point you in the right direction.
- Check online reviews – When looking for a painter, always check out online reviews first. This will give you an idea of what other customers have experienced with their service before hiring them.
- Look for portfolio samples – Before making any commitments, make sure to ask the painter for samples of their work. This will help you determine if they have the skills necessary to complete your project successfully.
- Get references – Asking for references from past clients is also a great way to ensure that the painter you’re considering has the experience and talent needed for your project.
- Paintshots is the perfect way to turn your cherished photos into one-of-a-kind works of art. We offer a variety of styles and sizes to choose from, so you can find the perfect piece to capture your memories. Plus, our paintings are carefully crafted with high-quality materials to ensure they last for years to come.
With these tips in mind, you’re sure to find the perfect service provider for creating unique gifts with your photos! Now that you've found a great artist, it's time to discuss ways to preserve your creation and keep it looking beautiful for years to come.
Preserving Your Creation
Once your portrait is finished, it's important to take steps to preserve it. The first thing you should do is frame it in a quality frame that won't cause damage over time. Make sure the frame has acid-free matting or glazing, and keep it away from direct sunlight or moisture.
You can also use a varnish or sealant on the painting to help preserve the colors. Apply several thin layers of varnish, allowing each layer to dry before applying the next. This will help protect against dust and dirt, as well as prevent fading due to UV light exposure.
If possible, store your painting in an area with low humidity and temperatures between 68-72 degrees Fahrenheit. Keeping your painting in these conditions ensures its longevity and maintains its beauty!
Conclusion
Painting a portrait from a photograph can be a rewarding experience. If you take the time to choose the right image, prepare your supplies, and sketch out outlines and shading, you will have an amazing piece of art that you can proudly display.
No matter what your skill level, anyone can create a stunning work of art from a photograph. With high-quality photography prints and professional services available to help create unique gifts, you can make sure your painting stands out from the crowd.
Once finished, remember to preserve your creation with care so that it can last for years to come. Even though this process may seem daunting at first, once you get started it's like riding a bike you'll never forget how to do it! So go ahead and give it a shot you might surprise yourself with how great your painting turns out.