

People who love to keep pets are almost always in a chirpy mood and have a very lively vibe. Keeping a pet enables you to exhibit immense love and warmth for your furry baby.
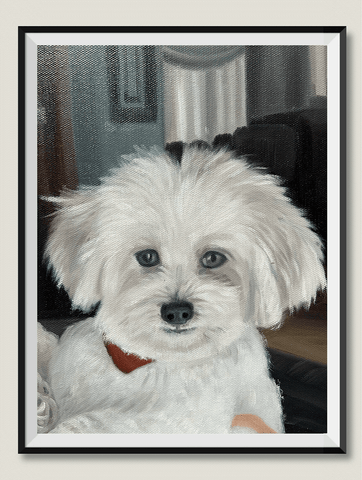
All pet lovers treat their furry babies like a family member, so why not make a cute portrait of them? It would be fun to make a picture painting of your cutie pie, which looks amazingly cute hanging on your wall.
If you want to know how to make a perfect portrait of your pet, worry not, we will discuss the easiest DIY method.
Following the step-by-step guide, you can easily paint pet portraits from photos. Why from photos you may wonder? Because they require less time.
So, without further delay, let’s get into the details.
Why Should You Paint Pet Portraits From Photos?
Currently, when clicking a photo and editing, using various software is the easiest job that anyone can do. Also, there is no doubt that HD cameras and high-end technology allow you to bring out the best in each photo you click. It would be best if you made portrait paintings because;
1. Paintings Look Classy
No matter how advanced technology can get, there is another charm in handmade painted portraits.
In addition to looking classy, hand painted portraits whet the yearning of your art-deprived soul.
Moreover, painting your pet from the photo is easy and quick.
It is tricky to make your little fellow sit still in one position for a long time while you paint. Even if you do, it will irritate your pet, so the smart solution is to paint from photos.
2. Tribute To Your Furry Baby
Pictures are the best way to keep the moments alive forever. It doesn’t matter how long you see the pictures; it always takes you down the memory lane to the time you clicked them. However, portrait painting is way beyond pictures, because the effort that we put into painting them, makes it special.
3. Creating A Lasting Memory
In the current time, when almost everything is artificial, a pet’s love is one of the purest forms of love in which they love unconditionally. This bond goes a long way, even after they’re no longer there with you.
However, having pictures of them keep them alive in your memories always. If you used to love a dog or a cat who’s no longer with you anymore, you could get their custom pet portrait designed.
Not only will it make you feel good, but it will show how much love you still have for them in your heart, creating a lasting memory.
How To Paint Pet Portraits From Photos?
When you have to create a pet portrait, you can do it two ways; either create a realistic online portrait using photoshop or do it manually using paints. The goal is to get final results that should be heartwarming.
So, in both cases, you get a nice and cute portrait of your furry baby. We will share the methods of manual and online cat or dogs portraits creation step by step.
Paint Pet Portraits Using Acrylic Paints Or Water Colors
If you are into painting, you know it’s fun to play with colors. However, no worries if you haven’t painted anything before; it requires practice and passion. The quick and easier option is to use Acrylic paints, as watercolors take too long to dry.
On the other side, Acrylic paint dries quicker, saving time and looking attractive compared to watercolors. However, it is a matter of your liking, and you can go with watercolors if you like them better.
Whether you want to use watercolors or acrylic paints, we will discuss how you can paint your pet the easiest way possible. To create a cat or dog painting, you must gather the following supplies.
- Canvas
- Graphite Paper
- Paints
- Pencil (for sketching)
- Brushes
- Paint Pens (optional for beginners)
1. Create Sections Before Starting
A painting's prospects of completion increase when divided into sections and layers. We will simplify the procedure this way by concentrating on coloring one layer at a time rather than a portion.
After applying the first coat of acrylic paint on the pet's face, return to the beginning and add the second layer. Since the cornerstone of a professional portrait is a perfect sketch with millimeter accuracy, this is crucial.
Sitting too close will have a significant impact on the outcome of your artwork.
2. Select A Background
Choose an image of your pet that clearly shows the prominent features of the face, including the eyes and nose. On a piece of printer paper, print the photo. Having a printed photo help, you create a painting with better finishing.
If you're painting with acrylics, the background will be simple. Acrylic paints dry fast, so you can start painting over top of the paint right away. The background color plays a main yet subtle role in enhancing the painting.
Taking into account the background's color is also crucial. You probably don't want a black background if you paint a black lab. The background should either contrast with or accentuate the subject.
3. Sketch An Outline
Draw the pet's outline with a pencil to make the rest of the job easy, as filling in the spots is much quicker and easy. Consider the eyes, nose, and ears the major features to trace. To determine how the fur moves in, trace a portion first and then do the entire body.
Tracing a picture of your pet onto carbon paper is one of the finest techniques to improve your cat or dog paintings as a beginner. If you’re not a beginner, you can skip using carbon paper and draw the sketch manually.
In both cases, sketching the main features will allow you to create a neat and attractive painting. If you are good at painting already, you can also try sketching partial features by drawing only tough features like eyes, mouth, etc.
4. Paint the Background
Choose a background color that will contrast well with the hue of your pet. Of course, the background color should be darker if the pet is light and light if the pet is darker; however, check whether the combination goes well with the paint.
You can paint a solid color, or you can combine your color with white to make an art-mixed background. Before moving on to the next stage, paint the backdrop using a “3/4" wash brush and allow it to dry.
5. Paint The Pet
Fill your paintbrush with your pet's hues. Begin with the basics and concentrate on larger shapes and proportions. Make sure your pet at least vaguely resembles the painting. Use raw or burned brown sienna if your pet is reddish in hue.
Start by drawing the contour of your pet using a #4 round brush. To create the shape of the pet, loosely paint the edges. Along the margins, add some fur patterns, which will overflow your background.
If your pet has special features or birthmarks, paint them. Paying attention to tiny details makes a visible difference in the paintings.
6. Draw Eyes
The eyes are the most crucial feature if you want to paint a pet with life and character. Psychologically we all look into the eyes whether we look at a photo or a painting.
No matter how wonderfully the rest of the image is painted, the portrait will look flat if the eyes need to be done right. Since eyes can be difficult for beginners to draw, you can use paint pens to draw the eyes. Now, examine the photo printout closely.
Typically, you'll want to draw a very fine line of black around the eyes' main contour first. You can paint the entire interior a medium grey or dark grey color based on what is shown in your photos if your pet has dark eyes and if the white section isn't visible.
Redraw the outside shape of the eye in black after everything has dried to finish the final look of the eyes.
7. Paint Other Features
Once you’re done with your eyes, it is comparatively easier to draw other features. Short strokes or just painting the shape in solid colors will work best if your pet has short hair. Longer, wavy strokes are best if your pet has lengthy hair.
Use a smaller brush to get to the delicate fur details, particularly those around the eyes and nose. Black and white pencils are probably all you'll need while drawing the nose. Paint the mouth first if your pet's mouth is open. Paint the lips last, then follow with the teeth.
8. Finalize The Painting
The skeleton serves as a guide for the other portions of your painting. The pet's skeleton makes it simple to define the rest of your pet, while the jaw and cheeks make it simpler to draw in a portrait.
Because you can always put more fur on top, think about your pet's skeletal structure behind the fur. Any remaining features, such as collars or whiskers, should be painted. Paint very fine lines for the whiskers with titanium white and a 10/0 round brush.
The Final Word
A painting of your pet at home keeps our pets alive in our memories even after they’re no longer with us. It is a cute way to show affection to your furry babies. Unlike photos, portraits look classy and are made with so much love.
If you are looking to learn the best ways to paint pet portraits from photos, we have shared two ways. You can create your pet portrait online in photoshop or paint it manually.